Deploy the BookInfo Application on an Intra-cluster Slice
Introduction
BookInfo is a sample application from Istio that is composed of four separate microservices: productpage, details, reviews, and ratings. In this topic, we will use the BookInfo application to demonstrate inter-slice communication.
Prerequisites
Before you begin, ensure the following prerequisites are met:
- You have the KubeSlice Controller components and worker cluster components on the same cluster. For more information, see Installing KubeSlice and Registering the Worker Cluster.
- Before creating a slice, create the
bookinfonamespace in all the participating worker clusters. Use the following command to create thebookinfonamespace:kubectl create ns bookinfo
Creating the Slice
To install the BookInfo application on a single cluster, you must create a slice without Istio enabled. For more information, see Creating a Slice.
Creating the BookInfo Deployment YAML Files
Using the templates below, create the necessary .yaml files to deploy the BookInfo application. All fields in the
template will remain the same except for the slice name which must be replaced with the name of your slice.
These instructions will guide you through deploying the Productpage service to a cluster we will refer to as
the productpage cluster, and the remaining services as well as service exports will be deployed to a
cluster referred to here as the services cluster.
ProductPage
Using the template below, create productpage.yaml. All fields in the template will remain the same except for
the slice name which must be replaced with the name of your slice.
##################################################################################################
# Productpage service
##################################################################################################
apiVersion: v1
kind: Service
metadata:
 name: productpage
 labels:
   app: productpage
   service: productpage
spec:
 type: NodePort
 ports:
 - port: 9080
   name: http
 selector:
   app: productpage
---
apiVersion: v1
kind: ServiceAccount
metadata:
 name: bookinfo-productpage
 labels:
   account: productpage
---
apiVersion: apps/v1
kind: Deployment
metadata:
 name: productpage-v1
 labels:
   app: productpage
   version: v1
spec:
 replicas: 1
 selector:
   matchLabels:
     app: productpage
     version: v1
 template:
   metadata:
     labels:
       app: productpage
       version: v1
   spec:
     serviceAccountName: bookinfo-productpage
     containers:
     - name: productpage
       image: docker.io/istio/examples-bookinfo-productpage-v1:1.16.2
       imagePullPolicy: IfNotPresent
       ports:
       - containerPort: 9080
       volumeMounts:
       - name: tmp
         mountPath: /tmp
       securityContext:
         runAsUser: 1000
       env:
       - name: REVIEWS_HOSTNAME
         value: reviews.bookinfo.svc.slice.local
       - name: DETAILS_HOSTNAME
         value: details.bookinfo.svc.slice.local
     - name: netshoot
       image: nicolaka/netshoot
       imagePullPolicy: IfNotPresent
       command: ["/bin/sleep", "3650d"]
       securityContext:
         capabilities:
           add: ["NET_ADMIN"]
         allowPrivilegeEscalation: true
         privileged: true
     volumes:
     - name: tmp
       emptyDir: {}
Details
Using the template below, create details.yaml. All fields in the template will remain the same except for
the slice name which must be replaced with the name of your slice.
##################################################################################################
# Details service
##################################################################################################
apiVersion: v1
kind: Service
metadata:
 name: details
 labels:
   app: details
   service: details
spec:
 ports:
 - port: 9080
   name: http
 selector:
   app: details
---
apiVersion: v1
kind: ServiceAccount
metadata:
 name: bookinfo-details
 labels:
   account: details
---
apiVersion: apps/v1
kind: Deployment
metadata:
 name: details-v1
 labels:
   app: details
   version: v1
spec:
 replicas: 1
 selector:
   matchLabels:
     app: details
     version: v1
 template:
   metadata:
     labels:
       app: details
       version: v1
   spec:
     serviceAccountName: bookinfo-details
     containers:
     - name: details
       image: docker.io/istio/examples-bookinfo-details-v1:1.16.2
       imagePullPolicy: IfNotPresent
       ports:
       - containerPort: 9080
       securityContext:
         runAsUser: 1000
     - name: netshoot
       image: nicolaka/netshoot
       imagePullPolicy: IfNotPresent
       command: ["/bin/sleep", "3650d"]
       securityContext:
         capabilities:
           add: ["NET_ADMIN"]
         allowPrivilegeEscalation: true
         privileged: true
Ratings
Using the template below, create ratings.yaml. All fields in the template will remain the same except for
the slice name which must be replaced with the name of your slice.
##################################################################################################
# Ratings service
##################################################################################################
apiVersion: v1
kind: Service
metadata:
 name: ratings
 labels:
   app: ratings
   service: ratings
spec:
 ports:
 - port: 9080
   name: http
 selector:
   app: ratings
---
apiVersion: v1
kind: ServiceAccount
metadata:
 name: bookinfo-ratings
 labels:
   account: ratings
---
apiVersion: apps/v1
kind: Deployment
metadata:
 name: ratings-v1
 labels:
   app: ratings
   version: v1
spec:
 replicas: 1
 selector:
   matchLabels:
     app: ratings
     version: v1
 template:
   metadata:
     labels:
       app: ratings
       version: v1
   spec:
     serviceAccountName: bookinfo-ratings
     containers:
     - name: ratings
       image: docker.io/istio/examples-bookinfo-ratings-v1:1.16.2
       imagePullPolicy: IfNotPresent
       ports:
       - containerPort: 9080
       securityContext:
         runAsUser: 1000
     - name: netshoot
       image: nicolaka/netshoot
       imagePullPolicy: IfNotPresent
       command: ["/bin/sleep", "3650d"]
       securityContext:
         capabilities:
           add: ["NET_ADMIN"]
         allowPrivilegeEscalation: true
         privileged: true
Reviews
Using the template below, create reviews.yaml. All fields in the template will remain the same except for
the slice name which must be replaced with the name of your slice.
##################################################################################################
# Reviews service
##################################################################################################
apiVersion: v1
kind: Service
metadata:
 name: reviews
 labels:
   app: reviews
   service: reviews
spec:
 ports:
 - port: 9080
   name: http
 selector:
   app: reviews
---
apiVersion: v1
kind: ServiceAccount
metadata:
 name: bookinfo-reviews
 labels:
   account: reviews
---
apiVersion: apps/v1
kind: Deployment
metadata:
 name: reviews-v3
 labels:
   app: reviews
   version: v3
spec:
 replicas: 1
 selector:
   matchLabels:
     app: reviews
     version: v3
 template:
   metadata:
     labels:
       app: reviews
       version: v3
   spec:
     serviceAccountName: bookinfo-reviews
     containers:
     - name: reviews
       image: docker.io/istio/examples-bookinfo-reviews-v3:1.16.2
       imagePullPolicy: IfNotPresent
       env:
       - name: LOG_DIR
         value: "/tmp/logs"
       ports:
       - containerPort: 9080
       volumeMounts:
       - name: tmp
         mountPath: /tmp
       - name: wlp-output
         mountPath: /opt/ibm/wlp/output
       securityContext:
         runAsUser: 1000
     - name: netshoot
       image: nicolaka/netshoot
       imagePullPolicy: IfNotPresent
       command: ["/bin/sleep", "3650d"]
       securityContext:
         capabilities:
           add: ["NET_ADMIN"]
         allowPrivilegeEscalation: true
         privileged: true
     volumes:
     - name: wlp-output
       emptyDir: {}
     - name: tmp
       emptyDir: {}
ServiceExports
Using the template below, create serviceexports.yaml. All fields in the template will remain the same except
for two slice name instances which must be replaced with the name of your slice.
##################################################################################
# Details ServiceExport
##################################################################################
apiVersion: networking.kubeslice.io/v1beta1
kind: ServiceExport
metadata:
 name: details
spec:
 slice: <slice name>  #Replace Slice Name
 selector:
   matchLabels:
     app: details
 ingressEnabled: false
 ports:
 - name: http
   containerPort: 9080
   protocol: TCP
---
##################################################################################
# Reviews ServiceExport
##################################################################################
apiVersion: networking.kubeslice.io/v1beta1
kind: ServiceExport
metadata:
 name: reviews
spec:
 slice: <slice name>  #Replace Slice Name
 selector:
   matchLabels:
     app: reviews
 ingressEnabled: false
 ports:
 - name: http
   containerPort: 9080
   protocol: TCP
Deploy the Application on a Single Cluster
Perform these steps:
- Use the following command to ensure we are targeting the cluster we deploy the product page to:
kubectx <services cluster> - Use the following command to create the
bookinfonamespace that we deploy these services on:kubectl create ns bookinfo - Use the following command to apply the
productpage.yamlfile:Expected Outputkubectl apply -f productpage.yaml -n bookinfoservice/productpage created
serviceaccount/bookinfo-productpage created
deployment.apps/productpage-v1 created - Use the following command to check if the deployed productpage pod is running on the cluster:
Expected Output
kubectl get pods -n bookinfoNAME READY STATUS RESTARTS AGE
productpage-v1-5cc46fc6dc-drd8b 4/4 Running 0 26h - Using the following commands, apply the details.yaml, ratings.yaml, reviews.yaml, and serviceexports.yaml files.
Use the following command to apply the
details.yamlfile.Expected Outputkubectl apply -f details.yaml -n bookinfoservice/details created
serviceaccount/bookinfo-details created
deployment.apps/details-v1 created - Use the following command to apply the
ratings.yamlfile:Expected Outputkubectl apply -f ratings.yaml -n bookinfoservice/ratings created
serviceaccount/bookinfo-ratings created
deployment.apps/ratings-v1 created - Use the following command to apply the
reviews.yamlfile:Expected Outputkubectl apply -f reviews.yaml -n bookinfoservice/reviews created
serviceaccount/bookinfo-reviews created
deployment.apps/reviews-v3 created - Use the following command to verify if the deployed pods are running on the cluster:
Expected Output
kubectl get pods -n bookinfoNAME READY STATUS RESTARTS AGE
details-v1-557b474454-fbfhh 4/4 Running 0 26h
ratings-v1-5846f848bb-4dwtz 4/4 Running 0 26h
reviews-v3-64cf7654f4-cfqz8 4/4 Running 0 26h - Use the following command to apply
serviceexports.yamlfile:Expected Outputkubectl apply -f serviceexports.yaml -n bookinfoserviceexport.networking.kubeslice.io/details created
serviceexport.networking.kubeslice.io/reviews created
You have completed the deployment of BookInfo application on a slice.**
Validate the BookInfo Deployment
Validate the Services
Perform these steps:
- Switch contexts to target the
services cluster.kubectx <services cluster> - Use the following command to verify the details and reviews services have been successfully exported to the
KubeSlice configuration:
Expected Output
kubectl get serviceexport -n bookinfokubectl get serviceexport -n bookinfo
NAME SLICE INGRESS PORT(S) ENDPOINTS STATUS ALIAS
details white 9080/TCP 1 READY
reviews white 9080/TCP 1 READY
Validate the Productpage on the Cloud Cluster
Perform these steps:
-
Switch contexts to target the
productpage cluster.kubectx <productpage cluster> -
Using the following command, verify the details and reviews service imports are present in the cluster:
kubectl get serviceimport -n bookinfoExpected Output
NAME      SLICE   PORT(S)    ENDPOINTS   STATUS  ALIAS
details   white   9080/TCP   1           READY
reviews white 9080/TCP 1 READY -
Use the following command to check the exposed port for the product page service. Use this port to visit the BookInfo webpage.
kubectl get services -n bookinfoExpected Output
NAME          TYPE        CLUSTER-IP     EXTERNAL-IP   PORT(S)          AGE
details       ClusterIP   10.0.116.23    <none>        9080/TCP         2d2h
productpage   NodePort    10.0.20.209    <none>        9080:31194/TCP   2d2h
reviews ClusterIP 10.0.146.220 <none> 9080/TCP 2d2hinfoTo view the deployed BookInfo product page, we need the external IP of an application node and the exposed port we just retrieved. Take note of the external IP address of one of the application nodes to use it later.
-
Use the following command to get your node details:
kubectl get nodes -o wideExpected Output (your output will differ, here we are just focused on the external IP address).
kubectl get nodes -o wide
NAME                                                  STATUS   ROLES    AGE   VERSION             INTERNAL-IP   EXTERNAL-IP      OS-IMAGE
KERNEL-VERSION   CONTAINER-RUNTIME
gke-preprod-knative--preprod-knative--aba5a0cc-9jrq   Ready    <none>   27h   v1.20.15-gke.3600   10.6.0.4      35.231.181.81    Container-Optimized OS from Google   5.4.170+         containerd://1.4.8
gke-preprod-knative--preprod-knative--aba5a0cc-xj3j   Ready    <none>   27h   v1.20.15-gke.3600   10.6.0.5      35.243.229.81    Container-Optimized OS from Google   5.4.170+         containerd://1.4.8
gke-preprod-knative--preprod-knative--d19d3a9f-c32x Ready <none> 28h v1.20.15-gke.3600 10.6.0.3 104.196.200.27 Container-Optimized OS from Google 5.4.170+ containerd://1.4.8 -
Combine the external IP address the command returns with the port you retrieved in the last step in the format below, and visit the page in a browser to view your multi-cluster BookInfo deployment.
http://<external ip>:<port>/productpageExample
Validate the Productpage on the Kind Cluster
Access the Productpage from the Local Machine
If the kind clusters are on a local machine, perform these steps:
- Set up port-forwarding from a local machine using the following command:
Example
kubectl port-forward svc/<service-name> -n <namespace-name> <host-port>:<container-port>kubectl port-forward svc/productpage -n bookinfo 31986:9080 - Open the browser to access the product page using the following URL:
Example
http://localhost:<host-port>/productpagehttp://localhost:31986/productpage
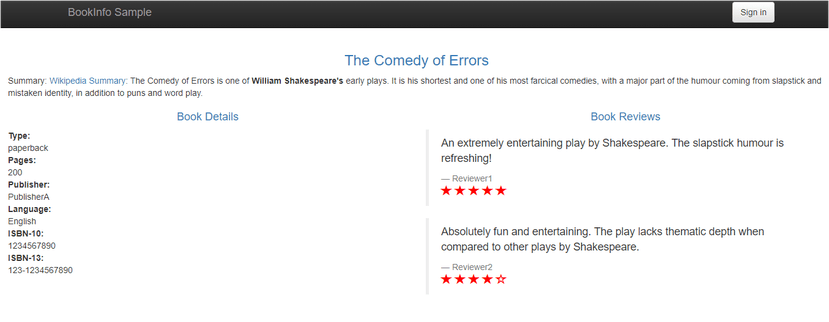
The following is an example of the product page:
Access the Productpage from the Cloud EC2 Machine
If the kind clusters are on Cloud EC2 Machine, perform these steps:
- Connect to your EC2 machine using SSH from your local machine using the following command:
Example
ssh -i <pemfile> ubuntu@<public IP> -N -L <hostport>:<nodeinternalip>:<container-port>ssh -i mykeypair.pem ubuntu@54.234.57.178 -N -L 8080:172.18.0.6:31986 - Open the browser to access the product page using the following URL:
Example
http://localhost:<hostport>/productpagehttp://localhost:8080/productpage
The following is an example of the product page:
You have successfully deployed the BookInfo application on a KubeSlice configuration containing at least two clusters.
Uninstall Istio BookInfo
To uninstall Istio BookInfo from your KubeSlice configuration, follow the instructions in offboarding namespaces.


